
The Jupyter Notebook has a feature known as widgets. If you have ever created a desktop user interface, you may already know and understand the concept of widgets. They are basically the controls that make up the user interface. In your Jupyter Notebook you can create sliders, buttons, text boxes and much more.
We will learn the basics of creating widgets in this chapter. If you would like to see some pre-made widgets, you can go to the following URL:
These widgets are Notebook extensions that can be installed in the same way that we learned about in my Jupyter extensions article. They are really interesting and well worth your time if you’d like to study how more complex widgets work by looking at their source code.
Getting Started
To create your own widgets, you will need to install the ipywidgets extension.
Installing with pip
Here is how you would install the widget extension with pip:
pip install ipywidgets
jupyter nbextension enable --py widgetsnbextension
If you are using virtualenv, you may need to use the --sys-prefix option to keep your environment isolated.
Installing with conda
Here is how you would install the widgets extension with conda:
conda install -c conda-forge ipywidgets
Note that when installing with conda, the extension will be automatically enabled.
Learning How to Interact
There are a number of methods for creating widgets in Jupyter Notebook. The first and easiest method is by using the interact function from ipywidgets.interact which will automatically generate user interface controls (or widgets) that you can then use to explore your code and interact with data.
Let's start out by creating a simple slider. Start up a new Jupyter Notebook and enter the following code into the first cell:
from ipywidgets import interact

def my_function(x):
    return x

# create a slider
interact(my_function, x=20)
Here we import the interact class from ipywidgets. Then we create a simple function called my_function that accepts a single argument and then returns it. Finally we instantiate interact by passing it a function along with the value that we want interact to pass to it. Since we passed in an integer (i.e. 20), the interact class will automatically create a slider.
Try running the cell that contains the code above and you should end up with something that looks like this:

That was pretty neat! Try moving the slider around with your mouse. If you do, you will see that the slider updates interactively and the output from the function is also automatically updated.
You can also create a FloatSlider by passing in floating point numbers instead of integers. Give that a try to see how it changes the slider.
Checkboxes
Once you are done playing with the slider, let's find out what else we can do with interact. Add a new cell in the same Jupyter Notebook with the following code:
interact(my_function, x=True)
When you run this code you will discover that interact has created a checkbox for you. Since you set "x" to **True**, the checkbox is checked. This is what it looked like on my machine:
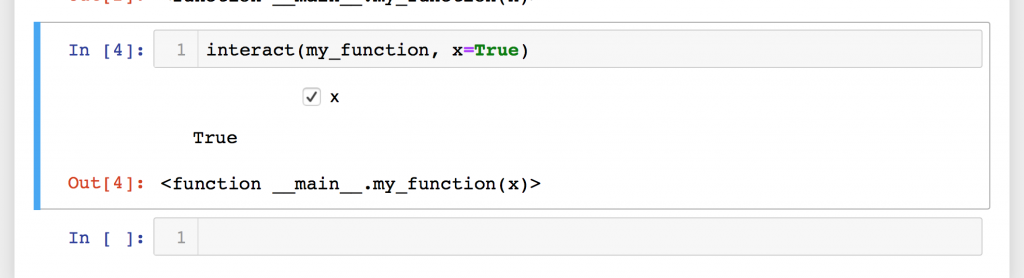
You can play around with this widget as well by just checking and un-checking the checkbox. You will see its state change and the output from the function call will also get printed on-screen.
Textboxes
Let's change things up a bit and try passing a string to our function. Create a new cell and enter the following code:
interact(my_function, x='Jupyter Notebook!')
When you run this code, you will find that interact generates a textbox with the string we passed in as its value:
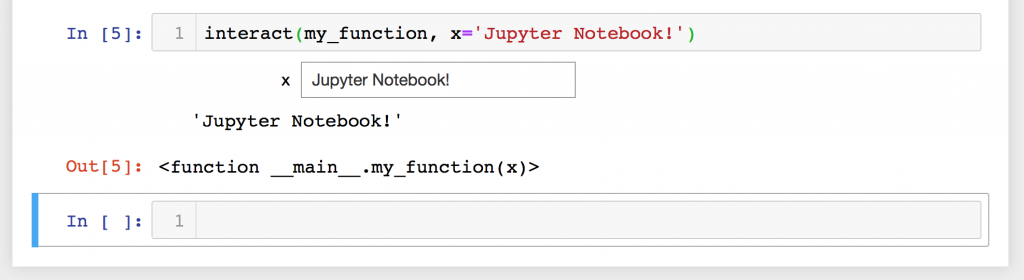
Try editing the textbox's value. When I tried doing that, I saw that the output text also changed.
Comboboxes / Drop-downs
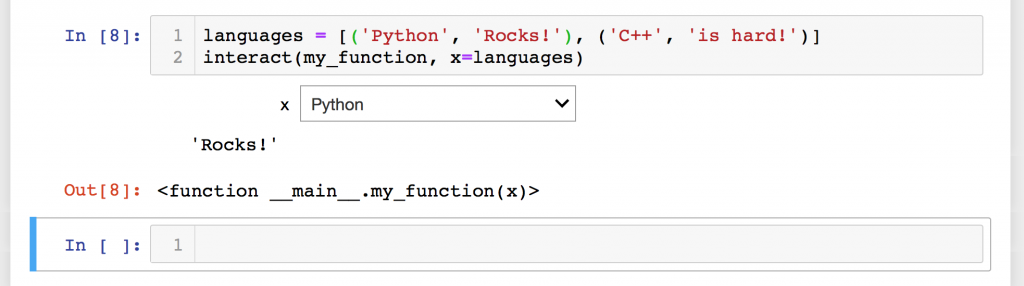
You can also create a combobox or drop-down widget by passing a list or a dictionary to your function in interact. Let's try passing in a list of tuples and see how that behaves. Go back to your Notebook and enter the following code into a new cell:
languages = [('Python', 'Rocks!'), ('C++', 'is hard!')]
interact(my_function, x=languages)
When you run this code, you should see "Python" and "C++" as items in the combobox. If you select one, the Notebook will display the second element of the tuple to the screen. Here is how my mine rendered when I ran this example:
If you'd like to try out a dictionary instead of a list, here is an example:
languages = {'Python': 'Rocks!', 'C++': 'is hard!'}
interact(my_function, x=languages)
The output of running this cell is very similar to the previous example.
More About Sliders
Let's back up a minute so we can talk a bit more about sliders. We can actually do a bit more with them than I had originally let on. When you first created a slider, all you needed to do was pass our function an integer. Here's the code again for a refresher:
from ipywidgets import interact

def my_function(x):
    return x

# create a slider
interact(my_function, x=20)
The value, 20, here is technically an abbreviation for creating an integer-valued slider. The code:
interact(my_function, x=20)
is actually the equivalent of the following:
interact(my_function, x=widgets.IntSlider(value=20))
Technically, Bools are an abbreviation for Checkboxes, lists / dicts are abbreviations for Comboboxes, etc.
Anyway, back to sliders again. There are actually two other ways to create integer-valued sliders. You can also pass in a tuple of two or three items:
- (min, max)
- (min, max, step)
This allows us to make the slider more useful as now we get to control the min and max values of the slider as well as set the step. The step is the amount of change to the slider when we change it. If you want to set an initial value, then you need to change your code to be like this:
def my_function(x=5):
    return x

interact(my_function, x=(0, 20, 5))
The x=5 in the function is what sets the initial value. I personally found that a little counter-intuitive as the IntSlider itself appears to be defined to work like this:
IntSlider(min, max, step, value)
The interact class does not instantiate IntSlider the same way that you would if you were creating one yourself.
Note that if you want to create a FloatSlider, all you need to do is pass in a float to any of the three arguments: min, max or step. Setting the function's argument to a float will not change the slider to a FloatSlider.
Using interact as a decorator
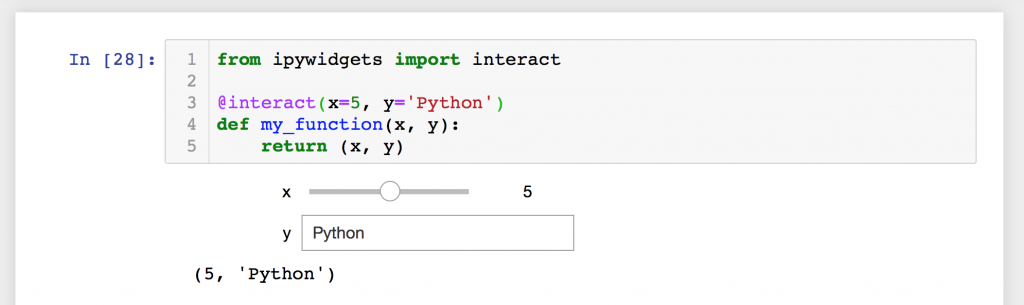
The interact class can also be used as a Python decorator. For this example, we will also add a second argument to our function. Go back to your running Notebook and add a new cell with the following code:
from ipywidgets import interact

@interact(x=5, y='Python')
def my_function(x, y):
    return (x, y)
You will note that in this example, we do not need to pass in the function name explicitly. In fact, if you did so, you would see an error raised. Decorators call functions implicitly. The other item of note here is that we are passing in two arguments instead of one: an integer and a string. As you might have guessed, this will create a slider and a text box respectively:
As with all the previous examples, you can interact with these widgets in the browser and see their outputs.
Fixed Arguments
There are many times where you will want to set one of the arguments to a set or fixed value rather than allowing it to be manipulated through a widget. The Jupyter Notebook ipywidgets package supports this via the fixed function. Let's take a look at how you can use it:
from ipywidgets import interact, fixed

@interact(x=5, y=fixed('Python'))
def my_function(x, y):
    return (x, y)
Here we import the fixed function from ipywidgets. Then in our interact decorator, we set the second argument as "fixed". When you run this code, you will find that it only creates a single widget: a slider. That is because we don't want or need a widget to manipulate the second argument.

In this screenshot, you can see that we have just the one slider and the output is a tuple. If you change the slider's value, you will see just the first value in the tuple change.
The interactive function
There is also a second function that is worth covering in this chapter that is called interactive. This function is useful during those times when you want to reuse widgets or access the data that is bound to said widgets. The biggest difference between interactive and interact is that with interactive, the widgets are not displayed on-screen automatically. If you want the widget to be shown, then you need to do so explicitly.
Let's take a look at a simple example. Open up a new cell in your Jupyter Notebook and enter the following code:
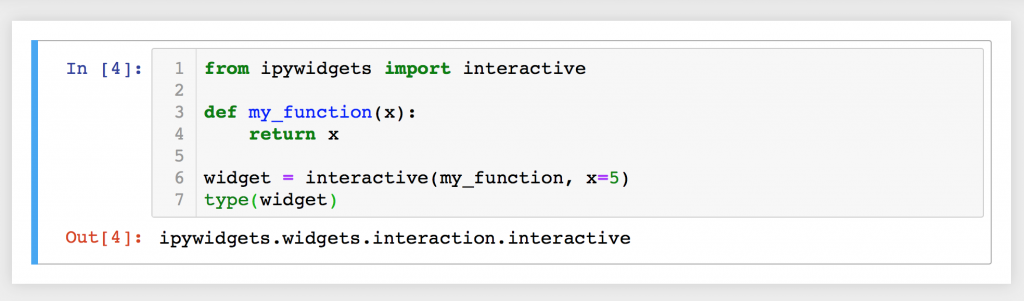
from ipywidgets import interactive

def my_function(x):
    return x

widget = interactive(my_function, x=5)
type(widget)
When you run this code, you should see the following output:
ipywidgets.widgets.interaction.interactive
But you won't see a slider widget like you did had you used the interact function. Just to demonstrate, here is a screenshot of what I got when I ran the cell:
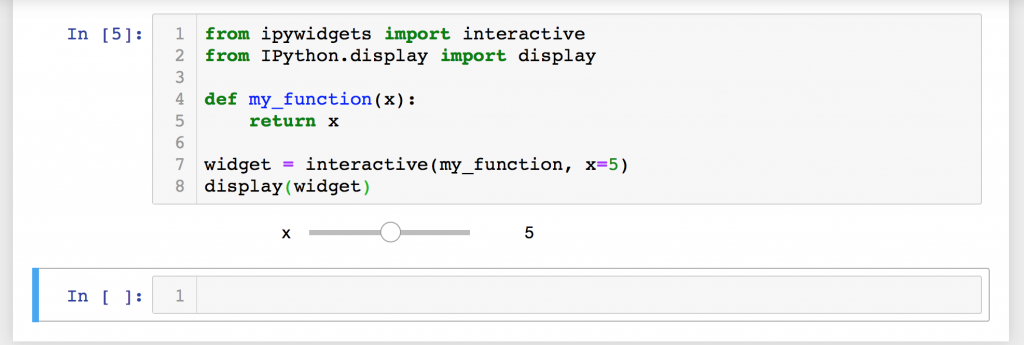
If you'd like the widget to be shown, you need to import the display function. Let's update the code in the cell to be the following:
from ipywidgets import interactive
from IPython.display import display

def my_function(x):
    return x

widget = interactive(my_function, x=5)
display(widget)
Here we import the display function from IPython.display and then we call it at the end of the code. When I ran this cell, I got the slider widget:
Why is this helpful? Why wouldn't you just use interact instead of jumping through extra hoops? Well the answer is that the interactive function gives you additional information that interact does not. You can access the widget's keyword arguments and its result. Add the following two lines to the end of the cell that you just edited:
print(widget.kwargs)
print(widget.result)
Now when you run the cell, it will print out the arguments that were passed to the function and the return value (i.e. result) of calling the function.
Wrapping Up
We learned a lot about Jupyter Notebook widgets in this chapter. We covered the basics of using the `interact` function as well as the `interactive` function. However there is more that you can about these functions by checking out the documentation.
Even this is just scratching the surface of what you can do with widgets in Jupyter. In the next chapter we will dig into creating widgets by hand outside of using the interact / interactive functions we learned about this in this chapter. We will learn much more about how widgets work and how you can use them to make your Notebooks much more interesting and potentially much more powerful.
Related Reading
- Jupyter Notebook Extension Basics
- Creating Presentations with Jupyter Notebook
Pingback: Working with Jupyter Notebook Widgets | The Mouse Vs. The Python
Pingback: Working with Jupyter Notebook Widgets - The Mouse Vs. The Python
Pingback: Python 101 - An Intro to Jupyter Notebook - Mouse Vs Python