When you are creating graphical user interfaces (GUIs), you will often find that you need to create more than one window. In this tutorial, you will learn how to create two windows with PySimpleGUI.
PySimpleGUI is one of the easiest Python GUIs to get started with. It wraps other Python GUIs and gives them a common interface. You can read more about it in my Intro to PySimpleGUI or in my article for Real Python, PySimpleGUI: The Simple Way to Create a GUI With Python.
Getting Started
You will want to install PySimpleGUI to get started using it. You can use pip for that:
python -m pip install pysimplegui
Making a Window Modal
PySimpleGUI provides a Window Element that you use to display other Elements in, such as buttons, text, images, and more. These Windows can be made Modal. A Modal Window won’t let you interact with any other Windows in your program until you exit it. This is useful when you want to force the user to read something or ask the user a question. For example, a modal dialog might be used to ask the user if they really want to Exit your program or to display an end-user agreement (EULA) dialog.
You can create two Windows and show them both at the same time in PySimpleGUI like this:
import PySimpleGUI as sg

def open_window():
    layout = [[sg.Text("New Window", key="new")]]
    window = sg.Window("Second Window", layout, modal=True)
    choice = None
    while True:
        event, values = window.read()
        if event == "Exit" or event == sg.WIN_CLOSED:
            break

    window.close()


def main():
    layout = [[sg.Button("Open Window", key="open")]]
    window = sg.Window("Main Window", layout)
    while True:
        event, values = window.read()
        if event == "Exit" or event == sg.WIN_CLOSED:
            break
        if event == "open":
            open_window()

    window.close()


if __name__ == "__main__":
    main()
When you run this code, you will see a small Main Window that looks like this:

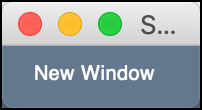
If you click on the “Open Window” button, you will get a new Window that looks like this:

This second window has a parameter named modal in it that is set to True. That means you cannot interact with the first Window until you close the second one.
Now let’s look at a way that you can shorten your code if you are creating a simple Window like the one above.
Creating a New Window In-Line
You don’t have to write a completely separate function for your secondary Window. If you’re not going to have a lot of widgets in the second Window, then you can create the Window as a one or two-liner.
Here is one way to do that:
import PySimpleGUI as sg


def main():
    layout = [[sg.Button("Open Window", key="open")]]
    window = sg.Window("Main Window", layout)
    while True:
        event, values = window.read()
        if event == "Exit" or event == sg.WIN_CLOSED:
            break
        if event == "open":
            if sg.Window("Other Window", [[sg.Text("Try Again?")],
                                          [sg.Yes(), sg.No()]]).read(close=True)[0] == "Yes":
                print("User chose yes!")
            else:
                print("User chose no!")

    window.close()


if __name__ == "__main__":
    main()
In this example, when you click the “Open Window” button, it creates the secondary Window in a conditional statement. This Window calls read() directly and closes when the user chooses “Yes”, “No” or exits the Window. Depending on what the user chooses, the conditional will print out something different.
The Traditional Multiple Window Design Patter
PySimpleGUI has a recommended method for working with multiple windows. It is mentioned in their Cookbook and in their demos on Github. Here is an example from Demo_Design_Pattern_Multiple_Windows.py:
import PySimpleGUI as sg
"""
    Demo - 2 simultaneous windows using read_all_window

    Window 1 launches window 2
    BOTH remain active in parallel

    Both windows have buttons to launch popups.  The popups are "modal" and thus no other windows will be active

    Copyright 2020 PySimpleGUI.org
"""

def make_win1():
    layout = [[sg.Text('This is the FIRST WINDOW'), sg.Text('      ', k='-OUTPUT-')],
              [sg.Text('Click Popup anytime to see a modal popup')],
              [sg.Button('Launch 2nd Window'), sg.Button('Popup'), sg.Button('Exit')]]
    return sg.Window('Window Title', layout, location=(800,600), finalize=True)


def make_win2():
    layout = [[sg.Text('The second window')],
              [sg.Input(key='-IN-', enable_events=True)],
              [sg.Text(size=(25,1), k='-OUTPUT-')],
              [sg.Button('Erase'), sg.Button('Popup'), sg.Button('Exit')]]
    return sg.Window('Second Window', layout, finalize=True)

window1, window2 = make_win1(), None        # start off with 1 window open

while True:             # Event Loop
    window, event, values = sg.read_all_windows()
    if event == sg.WIN_CLOSED or event == 'Exit':
        window.close()
        if window == window2:       # if closing win 2, mark as closed
            window2 = None
        elif window == window1:     # if closing win 1, exit program
            break
    elif event == 'Popup':
        sg.popup('This is a BLOCKING popup','all windows remain inactive while popup active')
    elif event == 'Launch 2nd Window' and not window2:
        window2 = make_win2()
    elif event == '-IN-':
        window['-OUTPUT-'].update(f'You enetered {values["-IN-"]}')
    elif event == 'Erase':
        window['-OUTPUT-'].update('')
        window['-IN-'].update('')
window.close()
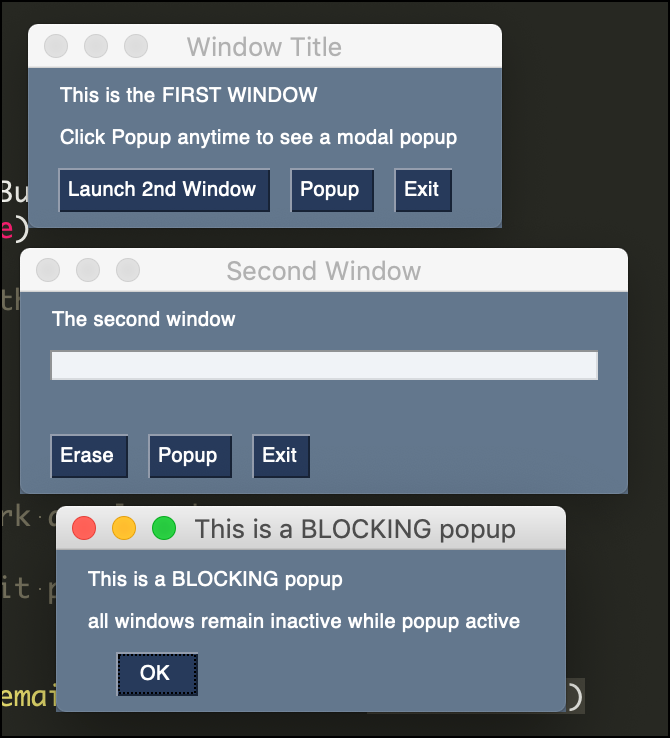
When you run this code, you can open up several different windows that look like this:

You will want to try out using both of these methods to see which works the best for you. The nice thing about this method is that you have only one event loop, which simplifies things.
Wrapping Up
PySimpleGUI lets you create simple as well as complex user interfaces. While it’s not covered here, you can also use sg.popup() to show a simpler dialog to the user. These dialogs are can be modal too but are not fully customizable like a regular Window is.
Give PySimpleGUI a try and see what you think.
