If you’re new to GUI programming (and wxPython in particular), you may not know what a “book” control is. It may be that other languages call this control something different too. In wxPython, a book control allows the user to switch between various panels. The most common examples are browsers and system option dialogs with tabbed interfaces. This article will walk you though the creation and basic configuration of these controls.
wxPython currently has seven of these controls built-in with an eighth in the agw AUI widget. I will cover the following widgets in this article (although not necessarily in this order) : AUI_Notebook, Choicebook, Listbook, Notebook, Toolbook, and Treebook. In the second article, I will cover the two agw book controls: FlatNotebook and the one embedded in the new agw AUI. Please note that this first post is a three page article. I personally don’t think the default WordPress pagination is very clear.
wx.Notebook
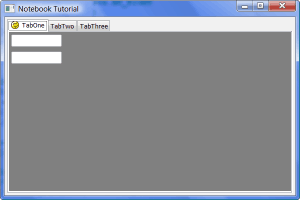
We will start with the most familiar book widget, the wx.Notebook. The following screenshot gives you an idea of what it should look like:
Each notebook tab (or page) will be made with a wx.Panel object. I have created three different panel classes that we will use for the tabs. I have taken some code from the wxPython Demo for these panels (and the book widgets) and modified them for this tutorial. Let’s take a look at one of the panels to give you an idea of what I’m doing:
import wx

class TabPanel(wx.Panel):
    """
    This will be the first notebook tab
    """
    #----------------------------------------------------------------------
    def __init__(self, parent):
        """"""

        wx.Panel.__init__(self, parent=parent, id=wx.ID_ANY)

        sizer = wx.BoxSizer(wx.VERTICAL)
        txtOne = wx.TextCtrl(self, wx.ID_ANY, "")
        txtTwo = wx.TextCtrl(self, wx.ID_ANY, "")

        sizer = wx.BoxSizer(wx.VERTICAL)
        sizer.Add(txtOne, 0, wx.ALL, 5)
        sizer.Add(txtTwo, 0, wx.ALL, 5)

        self.SetSizer(sizer)
The code above will create a panel with two text controls inside a vertical BoxSizer. That is all it will do. Now let’s see how we can use this code in conjunction with a wx.Notebook. Here’s a simple demo:
import images
import wx
import panelOne, panelTwo, panelThree

########################################################################
class NotebookDemo(wx.Notebook):
    """
    Notebook class
    """

    #----------------------------------------------------------------------
    def __init__(self, parent):
        wx.Notebook.__init__(self, parent, id=wx.ID_ANY, style=
                             wx.BK_DEFAULT
                             #wx.BK_TOP
                             #wx.BK_BOTTOM
                             #wx.BK_LEFT
                             #wx.BK_RIGHT
                             )

        # Create the first tab and add it to the notebook
        tabOne = panelOne.TabPanel(self)
        tabOne.SetBackgroundColour("Gray")
        self.AddPage(tabOne, "TabOne")

        # Show how to put an image on one of the notebook tabs,
        # first make the image list:
        il = wx.ImageList(16, 16)
        idx1 = il.Add(images.Smiles.GetBitmap())
        self.AssignImageList(il)

        # now put an image on the first tab we just created:
        self.SetPageImage(0, idx1)

        # Create and add the second tab
        tabTwo = panelTwo.TabPanel(self)
        self.AddPage(tabTwo, "TabTwo")

        # Create and add the third tab
        self.AddPage(panelThree.TabPanel(self), "TabThree")

        self.Bind(wx.EVT_NOTEBOOK_PAGE_CHANGED, self.OnPageChanged)
        self.Bind(wx.EVT_NOTEBOOK_PAGE_CHANGING, self.OnPageChanging)

    def OnPageChanged(self, event):
        old = event.GetOldSelection()
        new = event.GetSelection()
        sel = self.GetSelection()
        print 'OnPageChanged,  old:%d, new:%d, sel:%d\n' % (old, new, sel)
        event.Skip()

    def OnPageChanging(self, event):
        old = event.GetOldSelection()
        new = event.GetSelection()
        sel = self.GetSelection()
        print 'OnPageChanging, old:%d, new:%d, sel:%d\n' % (old, new, sel)
        event.Skip()


########################################################################
class DemoFrame(wx.Frame):
    """
    Frame that holds all other widgets
    """

    #----------------------------------------------------------------------
    def __init__(self):
        """Constructor"""
        wx.Frame.__init__(self, None, wx.ID_ANY,
                          "Notebook Tutorial",
                          size=(600,400)
                          )
        panel = wx.Panel(self)

        notebook = NotebookDemo(panel)
        sizer = wx.BoxSizer(wx.VERTICAL)
        sizer.Add(notebook, 1, wx.ALL|wx.EXPAND, 5)
        panel.SetSizer(sizer)
        self.Layout()

        self.Show()

#----------------------------------------------------------------------
if __name__ == "__main__":
    app = wx.PySimpleApp()
    frame = DemoFrame()
    app.MainLoop()
Let’s break this down a bit. First, I create an instance of the wx.Notebook class and name it NotebookDemo. In its “__init__”, I have some styles commented out. These styles tell the notebook where to place the tabs (i.e. on the top, left, right or bottom). The default is to place them on the top. You can comment out the default and uncomment one of the other lines to see the difference.
To create the first tab, all we need to do is the following:
# Create the first tab and add it to the notebook
tabOne = panelOne.TabPanel(self)
tabOne.SetBackgroundColour("Gray")
self.AddPage(tabOne, "TabOne")
Actually, we don’t even need to set the background color, but I did that to make the text controls stand out a bit more. If we don’t set the color, we can make this into a one-liner like this:
self.AddPage(panelOne.TabPanel(self), "TabOne")
The AddPage() method is the primary way to add a page to a notebook widget. This method has the following arguments:
AddPage(self, page, text, select, imageId)
I only add the page and the text for the tab. If you want, you can pass “True” as the 4th argument and make that tab be selected. The first tab will be selected by default though, so doing that would be kind of silly. The fifth argument allows the programmer to add an image to the tab; however, we do that with the next bit of code:
# Show how to put an image on one of the notebook tabs,
# first make the image list:
il = wx.ImageList(16, 16)
idx1 = il.Add(images.Smiles.GetBitmap())
self.AssignImageList(il)

# now put an image on the first tab we just created:
self.SetPageImage(0, idx1)
As you can see, we first create an ImageList and set the images to be 16×16. Then I use the “images” module from the wxPython Demo to create a smiley face and add that to the list. Next I assign the list to the notebook using AssignImageList(). To set one of the images from the ImageList on one of the tabs, you call SetPageImage() and pass the tab index as the first argument and the bitmap ImageList item instance as the second (i.e. idx1). In this example, I only add an image to the first tab.
The next few lines of code adds two more tabs to the notebook and then binds a couple of events: EVT_NOTEBOOK_PAGE_CHANGING and EVT_NOTEBOOK_PAGE_CHANGED. The EVT_NOTEBOOK_PAGE_CHANGING is fired when the user has clicked on a different tab then the one currently selected and ends when the new tab is fully selected. When the next tab is fully selected is when the EVT_NOTEBOOK_PAGE_CHANGED event gets fired. One handy use for the EVT_NOTEBOOK_PAGE_CHANGING event is to veto the event should you need the user to do something before switching tabs.
The documentation is your friend. You will find many handy methods there, such as GetPage, GetPageCount, GetPageImage, GetSelection, RemovePage, and DeletePage as well as many others.
The last topic I need to touch on for the wx.Notebook is how to nest the tabs. Nesting tabs is actually very easy to do in wxPython. All you need to do is create a panel with a notebook on it and then make that panel into a tab on another Notebook. It’s kind of hard to explain, so let’s look at some code instead:
import panelOne, panelTwo
import wx

class TabPanel(wx.Panel):
    """
    This will be the first notebook tab
    """
    #----------------------------------------------------------------------
    def __init__(self, parent):
        """"""

        wx.Panel.__init__(self, parent=parent, id=wx.ID_ANY)

        sizer = wx.BoxSizer(wx.VERTICAL)

        # Create some nested tabs on the first tab
        nestedNotebook = wx.Notebook(self, wx.ID_ANY)
        nestedTabOne = panelOne.TabPanel(nestedNotebook)
        nestedTabTwo = panelTwo.TabPanel(nestedNotebook)
        nestedNotebook.AddPage(nestedTabOne, "NestedTabOne")
        nestedNotebook.AddPage(nestedTabTwo, "NestedTabTwo")

        sizer = wx.BoxSizer(wx.VERTICAL)
        sizer.Add(nestedNotebook, 1, wx.ALL|wx.EXPAND, 5)

        self.SetSizer(sizer)
The above code just creates the panel with a notebook on it. I reused some of the panels for this sub-notebook. Now we just need to insert it into another notebook (or vice-versa):
import images
import wx
import nestedPanelOne, panelTwo, panelThree

########################################################################
class NestedNotebookDemo(wx.Notebook):
    """
    Notebook class
    """

    #----------------------------------------------------------------------
    def __init__(self, parent):
        wx.Notebook.__init__(self, parent, id=wx.ID_ANY, style=
                             wx.BK_DEFAULT
                             #wx.BK_TOP
                             #wx.BK_BOTTOM
                             #wx.BK_LEFT
                             #wx.BK_RIGHT
                             )

        # Create the first tab and add it to the notebook
        tabOne = nestedPanelOne.TabPanel(self)
        self.AddPage(tabOne, "TabOne")

        # Show how to put an image on one of the notebook tabs,
        # first make the image list:
        il = wx.ImageList(16, 16)
        idx1 = il.Add(images.Smiles.GetBitmap())
        self.AssignImageList(il)

        # now put an image on the first tab we just created:
        self.SetPageImage(0, idx1)

        # Create and add the second tab
        tabTwo = panelTwo.TabPanel(self)
        self.AddPage(tabTwo, "TabTwo")

        # Create and add the third tab
        self.AddPage(panelThree.TabPanel(self), "TabThree")
This code snippet really isn’t very different from our very first piece of code. The only difference is importing the right panel and adding it as a page to the notebook. Now we’ll move on to our next book control.
wx.Choicebook
The wx.Choicebook is a fusion of the notebook and wx.Choice widgets. This allows the user to click a drop-down control to choose which page to view. The Choicebook also inherits from wx.BookCtrlBase, so it has most of the same methods that wx.Notebook has. Let’s take a look at a quick demo:
import wx
import panelOne, panelTwo, panelThree

########################################################################
class ChoicebookDemo(wx.Choicebook):
    """
    Choicebook class
    """

    #----------------------------------------------------------------------
    def __init__(self, parent):
        wx.Choicebook.__init__(self, parent, wx.ID_ANY)

        # Create the first tab and add it to the notebook
        tabOne = panelOne.TabPanel(self)
        tabOne.SetBackgroundColour("Gray")
        self.AddPage(tabOne, "Book One")

        # Create and add the second tab
        tabTwo = panelTwo.TabPanel(self)
        self.AddPage(tabTwo, "Book Two")

        # Create and add the third tab
        self.AddPage(panelThree.TabPanel(self), "Book Three")

        self.Bind(wx.EVT_CHOICEBOOK_PAGE_CHANGED, self.OnPageChanged)
        self.Bind(wx.EVT_CHOICEBOOK_PAGE_CHANGING, self.OnPageChanging)

    #----------------------------------------------------------------------
    def OnPageChanged(self, event):
        old = event.GetOldSelection()
        new = event.GetSelection()
        sel = self.GetSelection()
        print 'OnPageChanged,  old:%d, new:%d, sel:%d\n' % (old, new, sel)
        event.Skip()

    #----------------------------------------------------------------------
    def OnPageChanging(self, event):
        old = event.GetOldSelection()
        new = event.GetSelection()
        sel = self.GetSelection()
        print 'OnPageChanging, old:%d, new:%d, sel:%d\n' % (old, new, sel)
        event.Skip()

########################################################################
class DemoFrame(wx.Frame):
    """
    Frame that holds all other widgets
    """

    #----------------------------------------------------------------------
    def __init__(self):
        """Constructor"""
        wx.Frame.__init__(self, None, wx.ID_ANY,
                          "Choicebook Tutorial",
                          size=(600,400))
        panel = wx.Panel(self)

        notebook = ChoicebookDemo(panel)
        sizer = wx.BoxSizer(wx.VERTICAL)
        sizer.Add(notebook, 1, wx.ALL|wx.EXPAND, 5)
        panel.SetSizer(sizer)
        self.Layout()

        self.Show()

#----------------------------------------------------------------------
if __name__ == "__main__":
    app = wx.PySimpleApp()
    frame = DemoFrame()
    app.MainLoop()
The code above is mostly the same as that of the notebook example, but even simpler. You just use the AddPage() method to add a new page to this book control too. The rest of the methods are pretty much the same as well from what I could see from the documentation. Take note that the Choicebook does have its own set of specially named events. If you use one of the other book’s event names instead, you’ll quickly find that your event handlers are not fired.
wx.Listbook
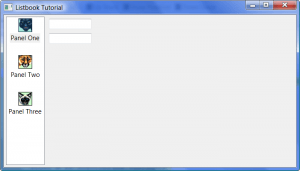
The Listbook control uses a ListCtrl to instead of tabs to control the notebook. In this case, you can actually use labeled pictures to change tabs. It’s kind of weird, but I think it’s kind of cool too. As with the Choicebook, this control inherits from the BookCtrlBase and has the same methods. The primary differences seem to lie with the Listbook’s appearance and in its unique set of events. Let’s take a quick peek at my demo to see how to create one!
import images
import wx
import panelOne, panelTwo, panelThree

########################################################################
class ListbookDemo(wx.Listbook):
    """"""

    #----------------------------------------------------------------------
    def __init__(self, parent):
        """Constructor"""
        wx.Listbook.__init__(self, parent, wx.ID_ANY, style=
                            wx.BK_DEFAULT
                            #wx.BK_TOP
                            #wx.BK_BOTTOM
                            #wx.BK_LEFT
                            #wx.BK_RIGHT
                            )
        # make an image list using the LBXX images
        il = wx.ImageList(32, 32)
        for x in range(3):
            obj = getattr(images, 'LB%02d' % (x+1))
            bmp = obj.GetBitmap()
            il.Add(bmp)
        self.AssignImageList(il)

        pages = [(panelOne.TabPanel(self), "Panel One"),
                 (panelTwo.TabPanel(self), "Panel Two"),
                 (panelThree.TabPanel(self), "Panel Three")]
        imID = 0
        for page, label in pages:
            self.AddPage(page, label, imageId=imID)
            imID += 1

        self.Bind(wx.EVT_LISTBOOK_PAGE_CHANGED, self.OnPageChanged)
        self.Bind(wx.EVT_LISTBOOK_PAGE_CHANGING, self.OnPageChanging)

    #----------------------------------------------------------------------
    def OnPageChanged(self, event):
        old = event.GetOldSelection()
        new = event.GetSelection()
        sel = self.GetSelection()
        print 'OnPageChanged,  old:%d, new:%d, sel:%d\n' % (old, new, sel)
        event.Skip()

    #----------------------------------------------------------------------
    def OnPageChanging(self, event):
        old = event.GetOldSelection()
        new = event.GetSelection()
        sel = self.GetSelection()
        print 'OnPageChanging, old:%d, new:%d, sel:%d\n' % (old, new, sel)
        event.Skip()

########################################################################
class DemoFrame(wx.Frame):
    """
    Frame that holds all other widgets
    """

    #----------------------------------------------------------------------
    def __init__(self):
        """Constructor"""
        wx.Frame.__init__(self, None, wx.ID_ANY,
                          "Listbook Tutorial",
                          size=(700,400)
                          )
        panel = wx.Panel(self)

        notebook = ListbookDemo(panel)
        sizer = wx.BoxSizer(wx.VERTICAL)
        sizer.Add(notebook, 1, wx.ALL|wx.EXPAND, 5)
        panel.SetSizer(sizer)
        self.Layout()

        self.Show()

#----------------------------------------------------------------------
if __name__ == "__main__":
    app = wx.PySimpleApp()
    frame = DemoFrame()
    app.MainLoop()
The Listbook’s “tab” controls can be set run along any of the sides, just like the wx.Notebook. You can also attach images with the same methods we used in the Notebook example at the beginning. I shortened the code up a bit by putting the panels in a list and looping over it, but other than that, there’s not much more to write about concerning this widget.
wx.Toolbook
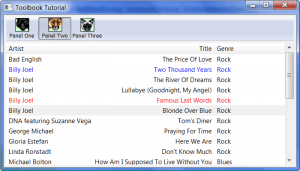
The Toolbook is a wx.Toolbar plus a wx.Notebook, which means that you use labeled bitmap buttons to control which “tab” of the notebook you are viewing. As you probably noticed with the Listbook example, I used the wxPython demo’s “images” module for its images and I use it again in my sample code here.
import images
import wx
import panelOne, panelTwo, panelThree

def getNextImageID(count):
    imID = 0
    while True:
        yield imID
        imID += 1
        if imID == count:
            imID = 0

########################################################################
class ToolbookDemo(wx.Toolbook):
    """
    Toolbook class
    """

    #----------------------------------------------------------------------
    def __init__(self, parent):
        """Constructor"""
        wx.Toolbook.__init__(self, parent, wx.ID_ANY, style=
                             wx.BK_DEFAULT
                             #wx.BK_TOP
                             #wx.BK_BOTTOM
                             #wx.BK_LEFT
                             #wx.BK_RIGHT
                            )

        # make an image list using the LBXX images
        il = wx.ImageList(32, 32)
        for x in range(3):
            obj = getattr(images, 'LB%02d' % (x+1))
            bmp = obj.GetBitmap()
            il.Add(bmp)
        self.AssignImageList(il)
        imageIdGenerator = getNextImageID(il.GetImageCount())

        pages = [(panelOne.TabPanel(self), "Panel One"),
                 (panelTwo.TabPanel(self), "Panel Two"),
                 (panelThree.TabPanel(self), "Panel Three")]
        imID = 0
        for page, label in pages:
            self.AddPage(page, label, imageId=imageIdGenerator.next())
            imID += 1

        self.Bind(wx.EVT_TOOLBOOK_PAGE_CHANGED, self.OnPageChanged)
        self.Bind(wx.EVT_TOOLBOOK_PAGE_CHANGING, self.OnPageChanging)

    #----------------------------------------------------------------------
    def OnPageChanged(self, event):
        old = event.GetOldSelection()
        new = event.GetSelection()
        sel = self.GetSelection()
        print 'OnPageChanged,  old:%d, new:%d, sel:%d\n' % (old, new, sel)
        event.Skip()

    #----------------------------------------------------------------------
    def OnPageChanging(self, event):
        old = event.GetOldSelection()
        new = event.GetSelection()
        sel = self.GetSelection()
        print 'OnPageChanging, old:%d, new:%d, sel:%d\n' % (old, new, sel)
        event.Skip()

########################################################################
class DemoFrame(wx.Frame):
    """
    Frame that holds all other widgets
    """

    #----------------------------------------------------------------------
    def __init__(self):
        """Constructor"""
        wx.Frame.__init__(self, None, wx.ID_ANY,
                          "Toolbook Tutorial",
                          size=(700,400)
                          )
        panel = wx.Panel(self)

        notebook = ToolbookDemo(panel)
        sizer = wx.BoxSizer(wx.VERTICAL)
        sizer.Add(notebook, 1, wx.ALL|wx.EXPAND, 5)
        panel.SetSizer(sizer)
        self.Layout()

        self.Show()

#----------------------------------------------------------------------
if __name__ == "__main__":
    app = wx.PySimpleApp()
    frame = DemoFrame()
    app.MainLoop()
The Toolbook follows in the footsteps of the previous controls as its lineage comes from the wx.BookCtrlBase. This widget’s claim to fame is its look and feel (although it looks very similar to the Listbook) and the Toolbook’s unique events. I used some fun code from the wxPython demo to help in assigning images to the toolbar’s buttons, but that’s really the only difference of any importance. For full disclosure, read the docs for this control!
wx.Treebook
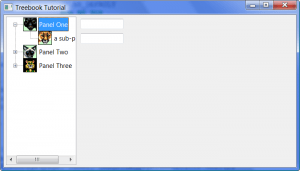
The Treebook control is a combination of the wx.TreeCtrl and the wx.Notebook. Most TreeCtrls that I’ve seen do not use images, but the wxPython demo uses them for the Treebook, so I decided to use them too. As you can see from the screenshot above, the bitmaps give the Treebook an interesting flavor. Let’s see how to make one of these controls!
import images
import wx
import panelOne, panelTwo, panelThree

def getNextImageID(count):
    imID = 0
    while True:
        yield imID
        imID += 1
        if imID == count:
            imID = 0

########################################################################
class TreebookDemo(wx.Treebook):
    """
    Treebook class
    """

    #----------------------------------------------------------------------
    def __init__(self, parent):
        """Constructor"""
        wx.Treebook.__init__(self, parent, wx.ID_ANY, style=
                             wx.BK_DEFAULT
                             #wx.BK_TOP
                             #wx.BK_BOTTOM
                             #wx.BK_LEFT
                             #wx.BK_RIGHT
                            )
        il = wx.ImageList(32, 32)
        for x in range(6):
            obj = getattr(images, 'LB%02d' % (x+1))
            bmp = obj.GetBitmap()
            il.Add(bmp)
        self.AssignImageList(il)
        imageIdGenerator = getNextImageID(il.GetImageCount())

        pages = [(panelOne.TabPanel(self), "Panel One"),
                 (panelTwo.TabPanel(self), "Panel Two"),
                 (panelThree.TabPanel(self), "Panel Three")]
        imID = 0
        for page, label in pages:
            self.AddPage(page, label, imageId=imageIdGenerator.next())
            imID += 1
            self.AddSubPage(page, 'a sub-page', imageId=imageIdGenerator.next())

        self.Bind(wx.EVT_TREEBOOK_PAGE_CHANGED, self.OnPageChanged)
        self.Bind(wx.EVT_TREEBOOK_PAGE_CHANGING, self.OnPageChanging)

        # This is a workaround for a sizing bug on Mac...
        wx.FutureCall(100, self.AdjustSize)

    #----------------------------------------------------------------------
    def AdjustSize(self):
        #print self.GetTreeCtrl().GetBestSize()
        self.GetTreeCtrl().InvalidateBestSize()
        self.SendSizeEvent()

    #----------------------------------------------------------------------
    def OnPageChanged(self, event):
        old = event.GetOldSelection()
        new = event.GetSelection()
        sel = self.GetSelection()
        print 'OnPageChanged,  old:%d, new:%d, sel:%d\n' % (old, new, sel)
        event.Skip()

    #----------------------------------------------------------------------
    def OnPageChanging(self, event):
        old = event.GetOldSelection()
        new = event.GetSelection()
        sel = self.GetSelection()
        print 'OnPageChanging, old:%d, new:%d, sel:%d\n' % (old, new, sel)
        event.Skip()

########################################################################
class DemoFrame(wx.Frame):
    """
    Frame that holds all other widgets
    """

    #----------------------------------------------------------------------
    def __init__(self):
        """Constructor"""
        wx.Frame.__init__(self, None, wx.ID_ANY,
                          "Treebook Tutorial",
                          size=(700,400)
                          )
        panel = wx.Panel(self)

        notebook = TreebookDemo(panel)
        sizer = wx.BoxSizer(wx.VERTICAL)
        sizer.Add(notebook, 1, wx.ALL|wx.EXPAND, 5)
        panel.SetSizer(sizer)
        self.Layout()

        self.Show()

#----------------------------------------------------------------------
if __name__ == "__main__":
    app = wx.PySimpleApp()
    frame = DemoFrame()
    app.MainLoop()
As with the Toolbook, I once again used a some code from the wxPython demo to create this demo and reused some of my own “framework” code. Besides the specialized events of the Treebook, you should also take note that it has an AddSubPage method, which adds a sub-node to the tree which in turn adds another page to the notebook. There are several other methods that only this control has: CollapseNode, ExpandNode, GetPageParent, GetTreeCtrl, InsertSubPage and IsNodeExpanded. I think they’re pretty self-explanatory, but don’t be afraid to read the documentation.
wx.AuiNotebook
Our final control for this article comes from the wx.aui namespace: the AuiNotebook. This is the only notebook control in this article that does not inherit from the generic BookCtrlBase. Be sure to study this control’s API to fully understand how to work with it as the AuiNotebook has several methods that are unlike the other controls we’ve seen so far.
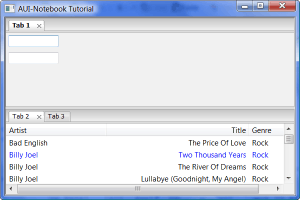
The AuiNotebook allows the user to rearrange the tabs, drag the tab into its own area (as you can see from the screenshot above) or even drag the tab from one AuiNotebook to another. The following code snippet will allow you to do all these things:
import wx
import wx.aui
import panelOne, panelTwo, panelThree

class DemoPanel(wx.Panel):
    """
    This will be the first notebook tab
    """
    #----------------------------------------------------------------------
    def __init__(self, parent):
        """"""
        wx.Panel.__init__(self, parent=parent, id=wx.ID_ANY)

        # create the AuiNotebook instance
        nb = wx.aui.AuiNotebook(self)

        # add some pages to the notebook
        pages = [(panelOne.TabPanel(nb), "Tab 1"),
                 (panelTwo.TabPanel(nb), "Tab 2"),
                 (panelThree.TabPanel(nb), "Tab 3")]
        for page, label in pages:
            nb.AddPage(page, label)

        sizer = wx.BoxSizer(wx.VERTICAL)
        sizer.Add(nb, 1, wx.EXPAND)
        self.SetSizer(sizer)

########################################################################
class DemoFrame(wx.Frame):
    """
    Frame that holds all other widgets
    """

    #----------------------------------------------------------------------
    def __init__(self):
        """Constructor"""
        wx.Frame.__init__(self, None, wx.ID_ANY,
                          "AUI-Notebook Tutorial",
                          size=(600,400))
        panel = DemoPanel(self)
        self.Show()

#----------------------------------------------------------------------
if __name__ == "__main__":
    app = wx.PySimpleApp()
    frame = DemoFrame()
    app.MainLoop()
For this simple example, I just created an instance of AuiNotebook by instantiating against wx.aui.AuiNotebook(self) and passing in a wx.Panel. Then I added some pages using the AuiNotebook’s AddPage() method. Notice also that you can close any tab by clicking on its individual “x”. Now you know how to make your own AuiNotebook!
Wrapping Up
In the second part of this article, we will discover the many interesting features of the AGW Notebooks. One of the main reasons I left them out of this round-up is because they are pure python modules and have lots of extra capabilities that are not in this set of widgets. All of this code was tested using wxPython 2.8.10.1 (unicode), Python 2.5 on Windows XP and Vista. All the examples should run fine on Mac and Linux too, but feel free to let me know how well they work in the comments!


Hi Mike,
Thanks for your great tutorial. Have you ever tried to make these examples with XRC? I like to use wxFormBuilder to create XRC and then use it to create your exmples. Would you please help me there.
Thanks
Mo
Hi Mike,
Thanks for your great tutorial. Have you ever tried to make these examples with XRC? I like to use wxFormBuilder to create XRC and then use it to create your exmples. Would you please help me there.
Thanks
Mo
Mike,
I was wondering where to find the import source for panelOne, panelTwo, etc?
RL
@ RL,
They should be in the source download at the bottom of page 3:
https://www.blog.pythonlibrary.org/2009/12/03/the-book-controls-of-wxpython-part-1-of-2/3/
I just checked and they appear to be there. Let me know if they’re not working for you.
– Mike
@ Mo,
I haven’t tried doing these examples in XRC yet, but I’ll give it a try sooner or later.
– Mike
@ Mo,
I haven’t tried doing these examples in XRC yet, but I’ll give it a try sooner or later.
– Mike
Mike
Nice tutorial, but how do you implement the OnPageChanging() and OnPageChanged() methods?
Also- how do you “put” widgets onto the tabs?
Something is broken here -> import panelOne, panelTwo, panelThree
You haven't provided any code to be imported
The code is in the download at the end of the article. I didn't show all my code since I put it in the source. Thanks,
– Mike
Tabs one, two and three in the demo are completely different. What are you talking about? You can import and use any of the panelX.py files and use them…
– Mike
Put some text in the text widgets
txtOne = wx.TextCtrl(self, wx.ID_ANY, “First”)
txtTwo = wx.TextCtrl(self, wx.ID_ANY, “Second”)
You will see the same text no matter which tab you click on.
These 2 widgets are “common” to all three tabs.
I would like to know how you put different widgets on each of the tabs, so you only see the widgets for Tab 1 when you click on Tab 1, etc.
Sorry- I was reading “The Amazing FlatNotebook” when I posted that msg.
There is no “change” events in that tutorial.
I hadn't seen the Tutorial for the wx.Notebook.
“s for putting widgets onto the tabs themselves, you'd probably need to draw them yourself or use one of Andrea Gavana's notebooks: FlatNotebook or his AuiNotebook.”
Wait – the while point behind using tabs is so that when you click on them, something different is displayed on each tab. Are you telling me that the stock notebook widgets can't even do that?
Ok- going back to my previous post…
Since the two widgets you've created show up when you click on any tab (aka common to all), how do you go about putting widgets that only show up when click on on tab (aka unique to that tab)?
If you put some text into the widgets that you've created
txtOne = wx.TextCtrl(self, wx.ID_ANY, “First”)
txtTwo = wx.TextCtrl(self, wx.ID_ANY, “Second”)
You will see that text no matter which tab you click on.
I'm interested in seeing how you put widgets so that a different widget is visible when you click on each tab.
As a noob to Python and wxPython (but a 30+ year veteran of professional programming), the most irritating thing I’ve found is when what should be a simple example of something (in this case, a notebook control) is completely obfuscated by addding subclass after subclass and import after import. I should be able to copy, paste amd run the sample code. Instead I get errors (images not found and what the heck are the imports for panelone, etc). What this tells me is that the poster is more concerned with showing off his skills and knowledge than he is with education other programmers. If you are giving an example of a control, KEEP IT SIMPLE. Perhaps a sample notebook with three pages, each page containing a couple of vanilla (buttons, text) widgets. Anything else just adds noise.
Hi,
If you had downloaded the complete code provided on the post (page 3), you wouldn’t have had any issues:
https://www.blog.pythonlibrary.org/2009/12/03/the-book-controls-of-wxpython-part-1-of-2/3/
The point of this particular post is to go over as many of the features of the various book controls as possible in an efficient manner. Unfortunately, that doesn’t always mean that the code will be simple. By the way, the word is “educating”, not “education”.
– Mike